BASIC applications collection
Table of Contents
1. Overview
This collection contains lots of applications:
- 2D Graphics
- 3D Graphics
- Games
- Math
- Miscellaneous applications that are hard to categorize
- Networking
I wrote them at around year 2000, mostly in QBasic.
2. 2D GFX
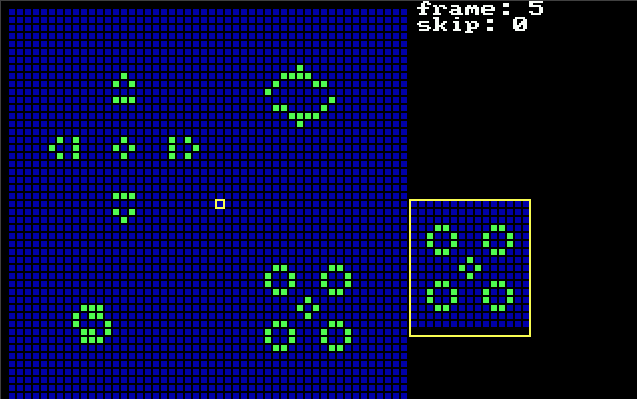
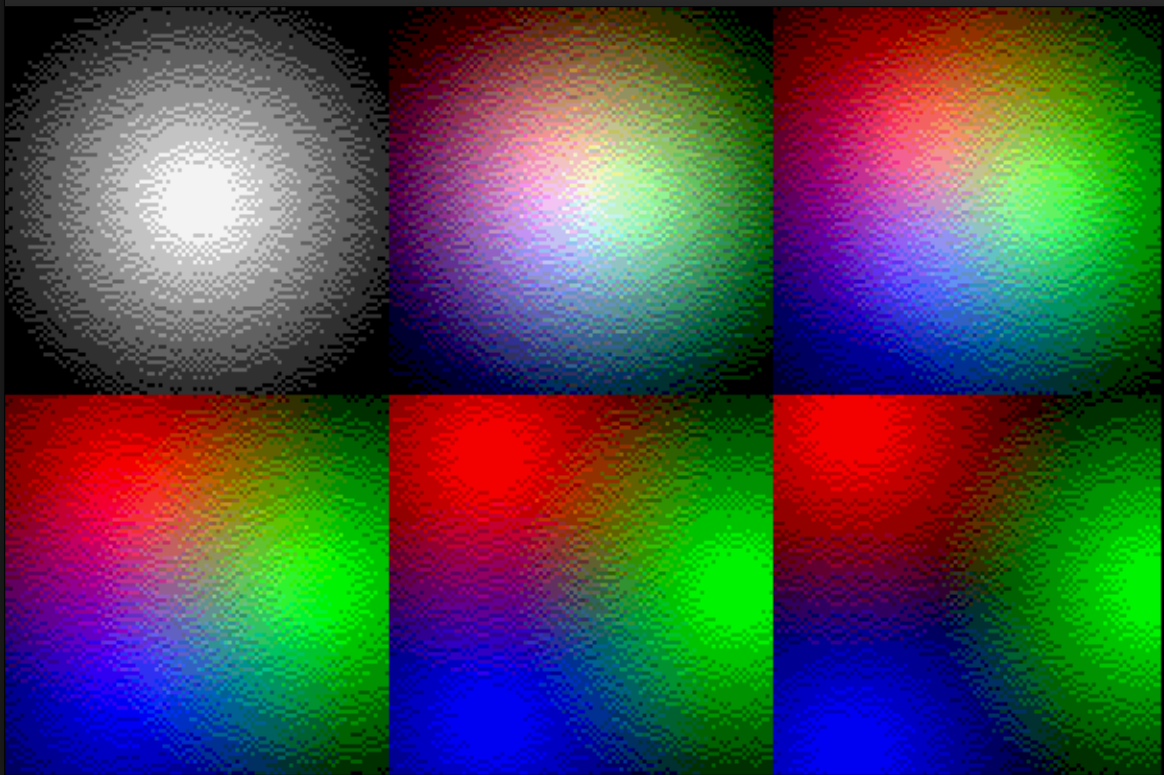
2.1. Animations
Collection of various 2D animations. Good for demonstrating various algorithms and getting fun looking results quite easily.
![]()
2.2. Fractals
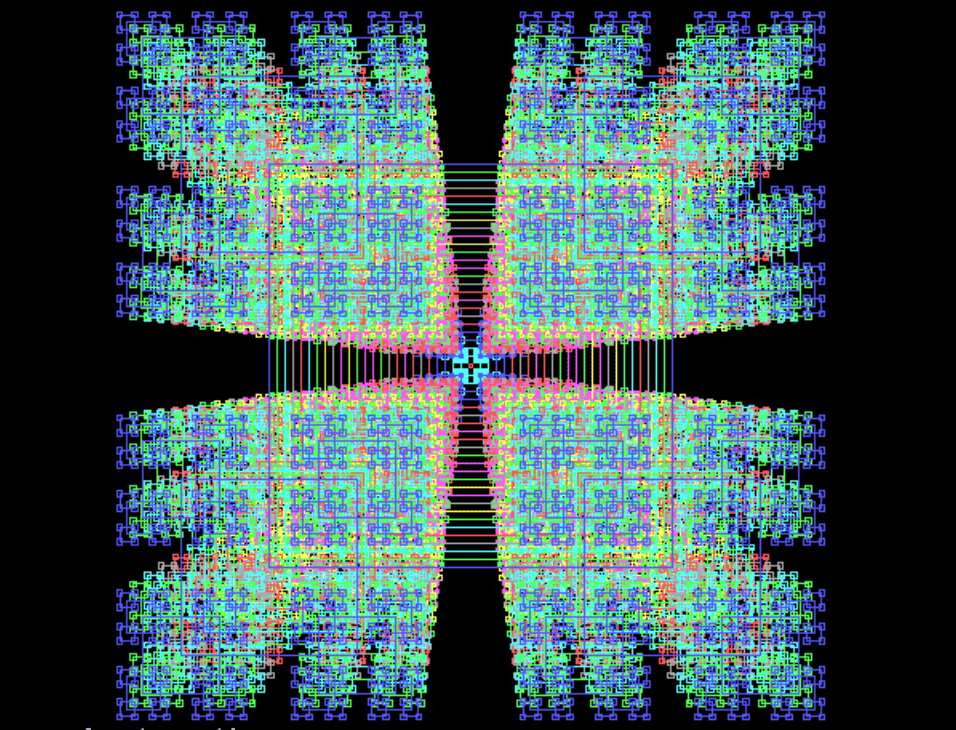
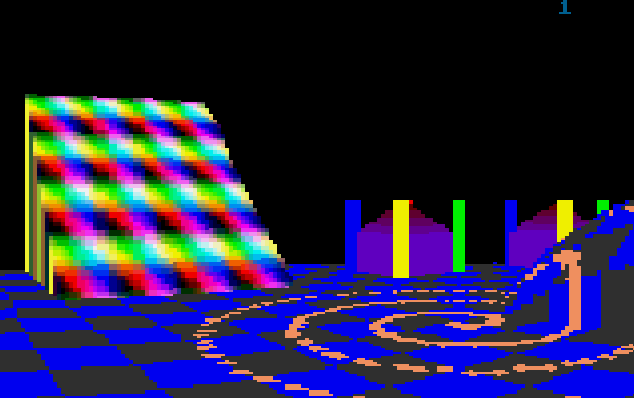
2.3. Spiral series
Small collection of programs that are result of exploratory programming, for fun. It started out from drawing spiral on the screen. Every iteration built upon previous result.
![]()
2.4. Algorithmic textures
2.5. Miscellaneous
2.5.1. Hello friend
This QBasic program is a simple yet engaging demonstration of 2D graphics capabilities. It showcases various graphical techniques such as pixel manipulation, geometric shapes, and simple animations.
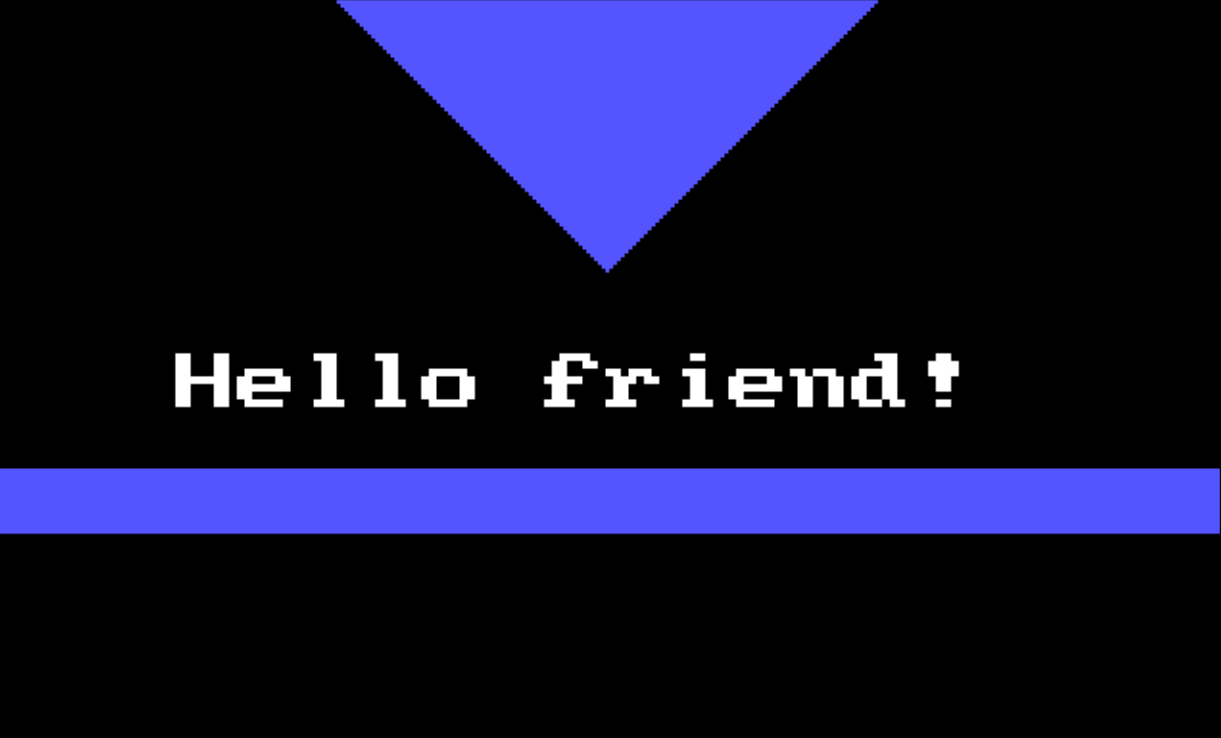
Download source code: Hello friend.bas
' 2D graphics demonstration.
'
' This program is free software: released under Creative Commons Zero (CC0) license
' by Svjatoslav Agejenko.
' Email: svjatoslav@svjatoslav.eu
' Homepage: http://www.svjatoslav.eu


SCREEN 13

LOCATE 1, 1
PRINT "   Hello friend!"

' Loop through each pixel in the screen to create an enlarged version of the current screen
FOR x = 0 TO 160
    FOR y = 0 TO 32
        colorVal = POINT(x, y)
        x1 = x * 2
        y1 = y * 2 + 90
        LINE (x1, y1)-(x1 + 1, y1 + 1), colorVal, BF
    NEXT y
NEXT x

LOCATE 1, 1
PRINT "                     "

' Draw a series of circles along the screen
FOR x = 0 TO 320
    CIRCLE (x, 130), 10, 9
    SOUND 0, .1
NEXT x

' Draw horizontal lines creating an X pattern
FOR y = 0 TO 70
    SOUND 0, .1
    LINE (160 - 70 + y, y)-(160 + 70 - y, y), 9
NEXT y
2.5.2. People
This QBasic program is a slideshow presentation tool that includes animated transitions and effects.
Download source code: People.bas
2.5.3. Stroboscope
This QBasic program is an educational presentation on how to build a stroboscope. It uses graphical animations and text to illustrate the schematics involved in constructing a stroboscope. The program is designed to be visually engaging, with animated transitions and diagrams.
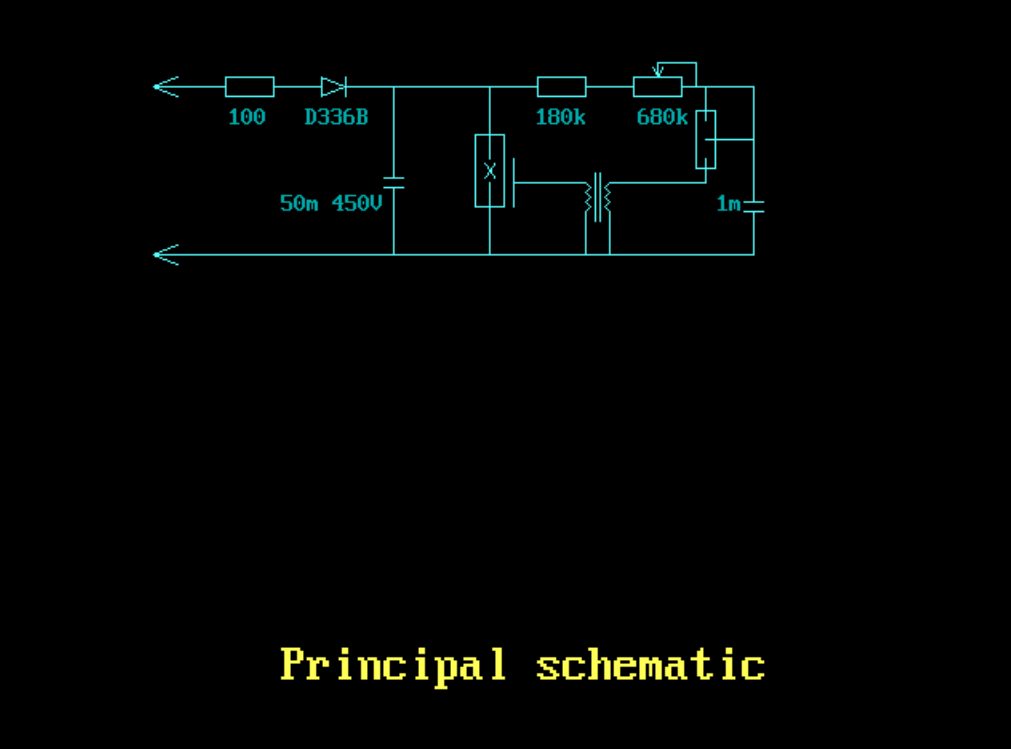
Download source code: Stroboscope.bas
2.5.4. Truncated cone
This QBasic program is designed to draw a 3D representation of a truncated cone, which consists of three main parts: a top cylinder with diagonal hatching, a middle frustum (truncated cone), and a bottom smaller cylinder. The primary goal of this program is to test the viability of generating images of 3D shapes using code.

Download source code: Truncated cone.bas
' Program that draws truncated cone:
' - Top Part: A cylinder (with diagonal hatching).
' - Middle Part: A frustum (truncated cone) – it widens from the bottom cylinder to the top cylinder.
' - Bottom Part: A smaller cylinder.
'
' Goal of this program is to test viability of programming/code to generate images of 3D shapes.
'
'
' This program is free software: released under Creative Commons Zero (CC0) license
' by Svjatoslav Agejenko.
' Email: svjatoslav@svjatoslav.eu
' Homepage: http://www.svjatoslav.eu
'
' Changelog:
' 2000, Initial version
' 2024 - 2025, Improved program readability


DECLARE SUB DrawLine (x%, y%, l%, clr%)

DEFINT A-Z
SCREEN 12

' Set up the palette
FOR a = 0 TO 16
    OUT &H3C8, a
    OUT &H3C9, a * 4
    OUT &H3C9, a * 4
    OUT &H3C9, a * 4
NEXT

' Draw the pattern
FOR x = 0 TO 200
    y = SQR((200 - x) * x) / 2
    DrawLine x + 200, y + 200, y * 2, t
    LINE (x + 200, y + 202)-(x + 200, y + 250), t
    IF x < 195 THEN
        LINE (300 + ((x - 100) / 2), y / 2 + 328)-(x + 200, y + 252), t
    END IF
    LINE (300 + ((x - 100) / 2), y / 2 + 330)-(300 + ((x - 100) / 2), y / 2 + 370), t
NEXT x

SUB DrawLine (x, y, l, clr)
    ' Calculate the initial color value
    c = 650 - y - x

    ' Adjust color to be within a specific range
1   IF c > 30 THEN
        c = c - 30
        GOTO 1
    END IF

    clr = c
    IF clr > 15 THEN
        clr = 30 - clr
    END IF

    ' Draw a vertical line with varying colors
    FOR y1 = y TO y - l STEP -1
        c1 = c
        IF c1 > 15 THEN
            c1 = 30 - c1
        END IF

        PSET (x, y1), c1

        ' Increment the color and wrap around if necessary
        c = c + 1
        IF c > 30 THEN
            c = c - 30
        END IF
    NEXT y1
END SUB
3. 3D GFX
3.1. Miscellaneous 3D demos
3.2. Space related animations
3.3. 3D Synthezier
Parses scene definition language and creates 3D world based on it. Result will be in a wavefront obj file, witch can be then visualized using external renderer.
See directory:
3D GFX/3D Synthetizer/

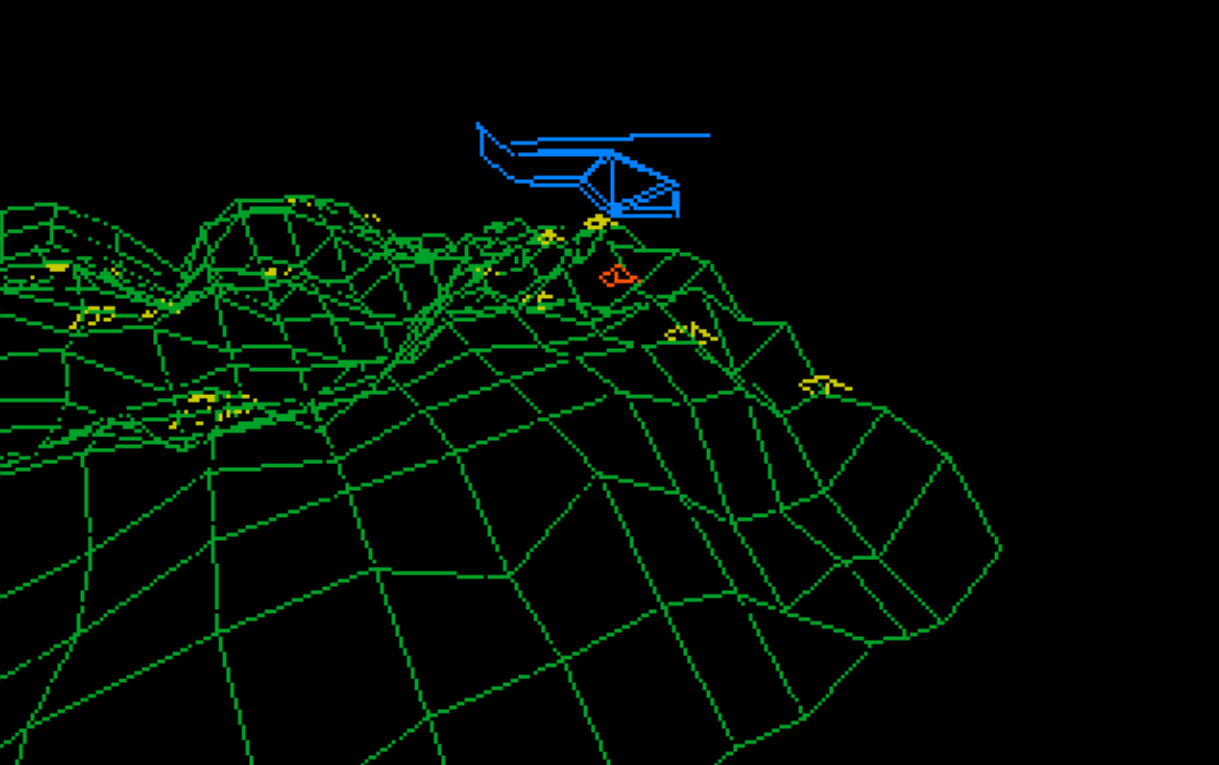
3.4. Helicopter demo
This QBasic program is a demonstration of real-time 3D graphics rendering. Also it shows 3D transformations, fractal terrain generation, and simple animation.
A fractal algorithm is used to create a realistic terrain by iteratively subdividing and perturbing pixel values.
The program includes an animated sequence featuring a helicopter that moves across the terrain and picks up objects.
3.5. Swapping 3D engine
This QBasic program is a 3D wireframe rendering engine designed to render potentially infinite 3D worlds. It achieves this by dynamically managing world data through a partitioning system that loads and offloads cube-shaped fragments of the world into and out of RAM as needed. This allows for the efficient use of memory, making it possible to explore large virtual environments without excessive resource consumption.
World data is stored on disk, and only the necessary parts are loaded into RAM, allowing for the potential rendering of very large worlds.
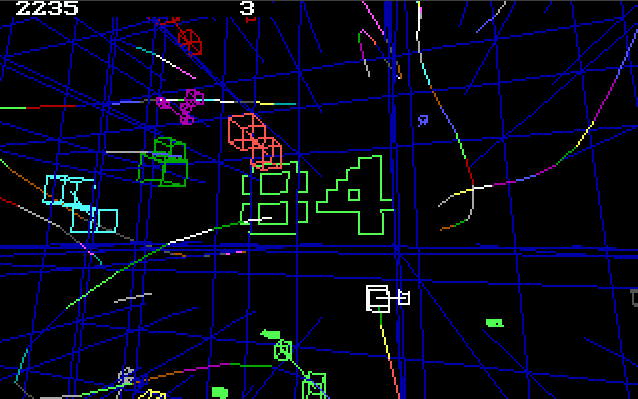
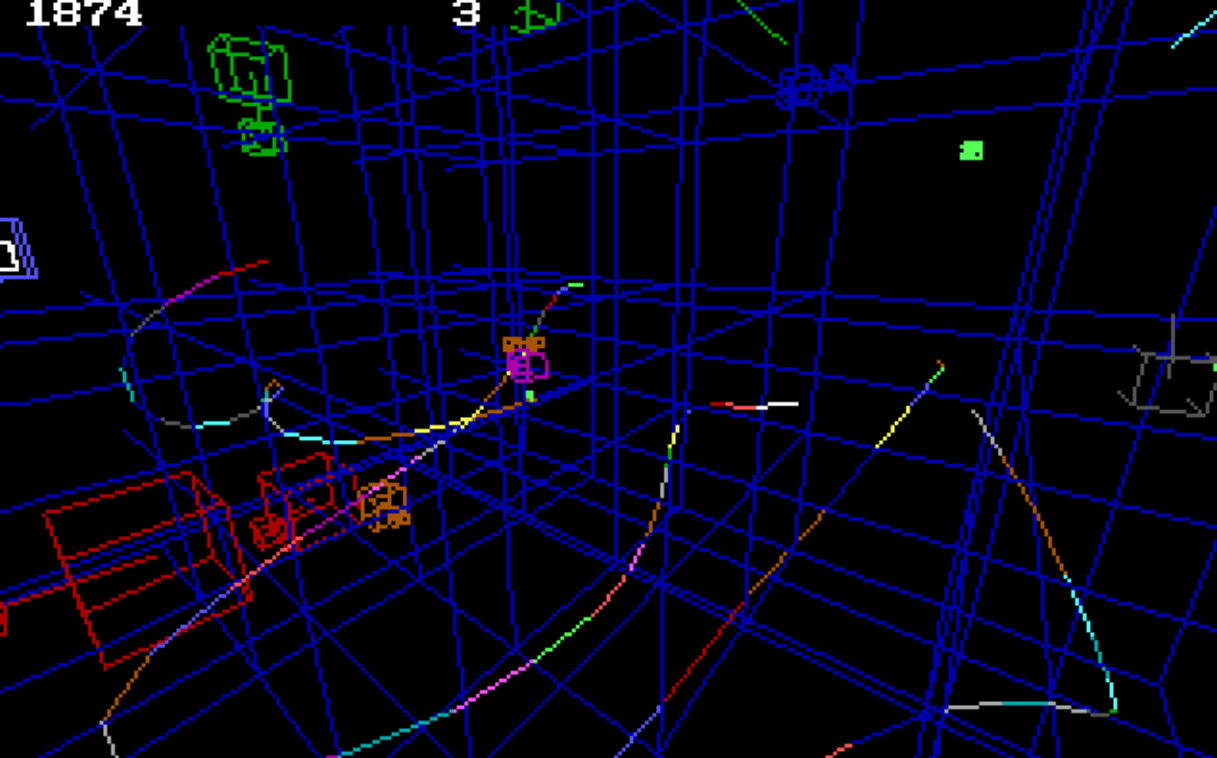
Download source code: engine.bas
3.6. 3D land
This QBasic program creates a visually engaging 3D shaded landscape with perspective and distortion effects.
The program loops through each point in the grid, applying a cosine distortion based on the distance from the center of the grid. This creates a wavy, undulating effect across the landscape. Perspective transformation is then applied to give the illusion of depth.
The transformed coordinates are used to draw quadrilaterals, which are filled with colors that alternate to create a checkerboard pattern.
Download source code: 3D land.bas
DECLARE SUB DrawQuadrilateral (xCoord1%, yCoord1%, xCoord2%, yCoord2%, xCoord3%, yCoord3%, xCoord4%, yCoord4%, colorVal%)
' Program to render 3D shaded landscape with perspective and distortion effects.
'
' This program is free software: released under Creative Commons Zero (CC0) license
' by Svjatoslav Agejenko.
' Email: svjatoslav@svjatoslav.eu
' Homepage: http://www.svjatoslav.eu
'
' Changelog:
' 1999, Initial version
' 2024 - 2025, Improved program readability

DECLARE SUB SetPalette ()
DEFINT A-Z
' Declare shared arrays for X and Y coordinates
DIM SHARED xCoordinates(1 TO 40, 1 TO 40)
DIM SHARED yCoordinates(1 TO 40, 1 TO 40)

' Set screen mode to 12: 640x480 pixels, 16 colors
SCREEN 12

' Initialize color palette
SetPalette

' Set initial scaling factor
scalingFactor = 1.5

' Main loop start
1 :
' Loop through each point in the grid
FOR rowIndex = 1 TO 40
    FOR colIndex = 1 TO 40
        ' Calculate the position with distortion
        xPos = 120 + (colIndex * 10)
        yPos = 200 + (rowIndex * 3)

        ' Apply a cosine distortion based on distance from center
        yPos = yPos - COS(SQR((colIndex - 20) ^ 2 + (rowIndex - 20) ^ 2) / scalingFactor) * 20

        ' Apply perspective transformation
        xPos = (xPos - 320) * (rowIndex + 50) / 50 + 320
        yPos = (yPos - 240) * (rowIndex + 50) / 50 + 240

        ' Store the transformed coordinates
        xCoordinates(colIndex, rowIndex) = xPos
        yCoordinates(colIndex, rowIndex) = yPos
    NEXT colIndex
NEXT rowIndex

' Draw grid based on the stored coordinates
FOR rowIndex = 1 TO 39
    FOR colIndex = 1 TO 39
        ' Alternate colors for each box
        IF (colIndex + rowIndex) \ 2 <> (colIndex + rowIndex + 1) \ 2 THEN colorIndex = 0 ELSE colorIndex = 5

        ' Calculate a brightness factor
        brightnessFactor = rowIndex + (colIndex / 3)

        ' Draw the quadrilateral with the calculated color and brightness
        DrawQuadrilateral xCoordinates(colIndex, rowIndex), yCoordinates(colIndex, rowIndex), xCoordinates(colIndex + 1, rowIndex), yCoordinates(colIndex + 1, rowIndex), xCoordinates(colIndex, rowIndex + 1), yCoordinates(colIndex, rowIndex + 1),  _
xCoordinates(colIndex + 1, rowIndex + 1), yCoordinates(colIndex + 1, rowIndex + 1), colorIndex
    NEXT colIndex
NEXT rowIndex

' Wait for user input and adjust the scaling factor
userInput$ = INPUT$(1)
scalingFactor = scalingFactor * 1.9

' Clear the screen for the next iteration
CLS

' If the scaling factor is too large, exit the program
IF scalingFactor > 10 THEN SYSTEM

' Jump back to the main loop start
GOTO 1

' Subroutine to draw a filled box using line drawing
SUB DrawQuadrilateral (xCoord1, yCoord1, xCoord2, yCoord2, xCoord3, yCoord3, xCoord4, yCoord4, colorVal)
    ' Fills a quadrilateral area by connecting the edges.
    ' It uses a scanline approach, storing intersection points, then drawing horizontal lines between those intersection points.
    ' Adjust color index based on position and brightness factor
    colorVal = colorVal + (yCoord2 - yCoord1) / 3.5 + (brightnessFactor / 8) + 4
    ' Ensure the color index is within valid range
    IF colorVal < 0 THEN colorVal = 0
    IF colorVal > 15 THEN colorVal = 15
    ' Calculate the length of the longer side
    sideLength1 = SQR((xCoord1 - xCoord2) ^ 2 + (yCoord1 - yCoord2) ^ 2)
    sideLength2 = SQR((xCoord3 - xCoord4) ^ 2 + (yCoord3 - yCoord4) ^ 2)
    IF sideLength2 < sideLength1 THEN sideLength2 = sideLength1
    ' Draw the box using lines
    FOR lineIndex = 1 TO sideLength2
        xCoord5 = (xCoord2 - xCoord1) * lineIndex / sideLength2 + xCoord1
        yCoord5 = (yCoord2 - yCoord1) * lineIndex / sideLength2 + yCoord1
        xCoord6 = (xCoord4 - xCoord3) * lineIndex / sideLength2 + xCoord3
        yCoord6 = (yCoord4 - yCoord3) * lineIndex / sideLength2 + yCoord3
        ' Draw two adjacent lines to create a filled effect
        LINE (xCoord5, yCoord5)-(xCoord6, yCoord6), colorVal
        LINE (xCoord5 + 1, yCoord5)-(xCoord6 + 1, yCoord6), colorVal
    NEXT lineIndex
END SUB

' Subroutine to initialize color palette
SUB SetPalette
    ' Initializes the color palette for the screen.
    ' It sets the RGB values for each color index in the palette.
    FOR paletteIndex = 1 TO 16
        ' Set the color values for each palette entry
        OUT &H3C8, paletteIndex
        OUT &H3C9, paletteIndex * 4
        OUT &H3C9, paletteIndex * 4
        OUT &H3C9, paletteIndex * 3
    NEXT paletteIndex
END SUB
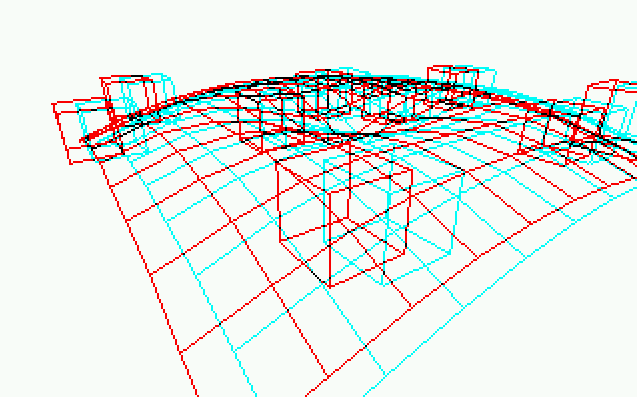
3.7. Anaglyph
This QBasic program creates a real-time anaglyph projection featuring bouncing cubes. Cubes are created and placed within a 3D space. Each cube has its own position and velocity, which determine its movement and interactions within the environment.
Anaglyph images are used to provide a stereoscopic 3D effect when viewed with glasses that have two different colored lenses, typically red and cyan. The program provides insight into how anaglyph images work, which can be a fun and educational project for those interested in stereoscopy and 3D visualization.
3.8. Ray casting engine
This QBasic program is a real-time 3D rendering engine that uses a ray casting technique to create a dynamic 3D landscape. The landscape includes various features such as hills and towers.
Real-time Rendering: The engine adjusts the rendering quality dynamically to maintain a constant frame rate of 10 frames per second, ensuring smooth performance even on older hardware like an Intel Pentium 200 MHz in DOS mode.
Users can move around the landscape using arrow keys and other specified keys to turn, look up/down, and even jump.
Download source code: Ray casting engine.bas
4. Games
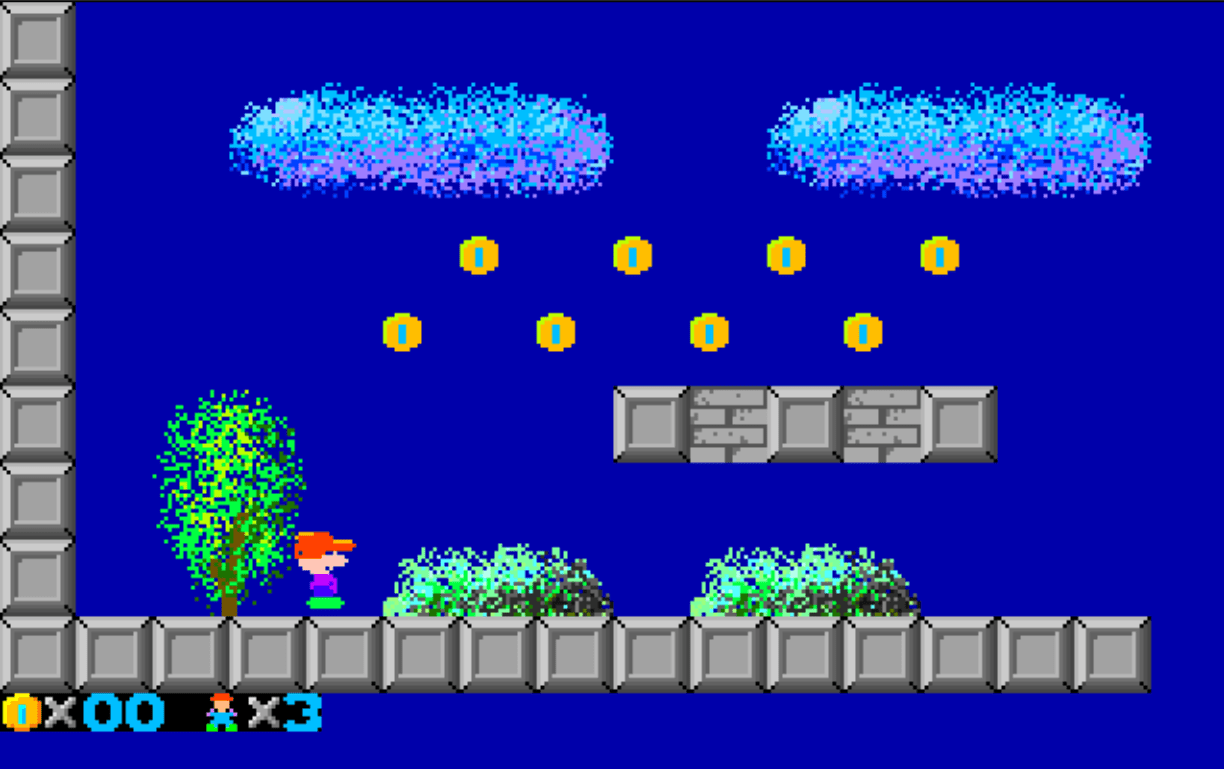
4.1. Pomppu Paavo
Player controls small character that has to collect coins and move between screens. Player has to avoid contact with evil hedgehogs.

4.2. Pomppu Paavo 2
Player controls small character that has to collect coins and move between screens. Player has to avoid contact with evil snails.
Source code organization:
├── img                  <- Visual game assets
│   ├── 0.i01
│   ├── 1.i01
│   ├── 2.i01
│   ├── ...
├── Pomppu Paavo.bas     <- Main game executable
4.3. Multiplayer game of worms
Game supports up to 5 players. Any amount of those players can be AI controlled. Game has multiple levels. After worms have eaten certain amount of fruits, game advances to the next level. Each worm has limited amount of lives. When worm runs into the wall or another worm, it loses one life.
Levels are stored in 'lvl' files that are directly editable using text editor.
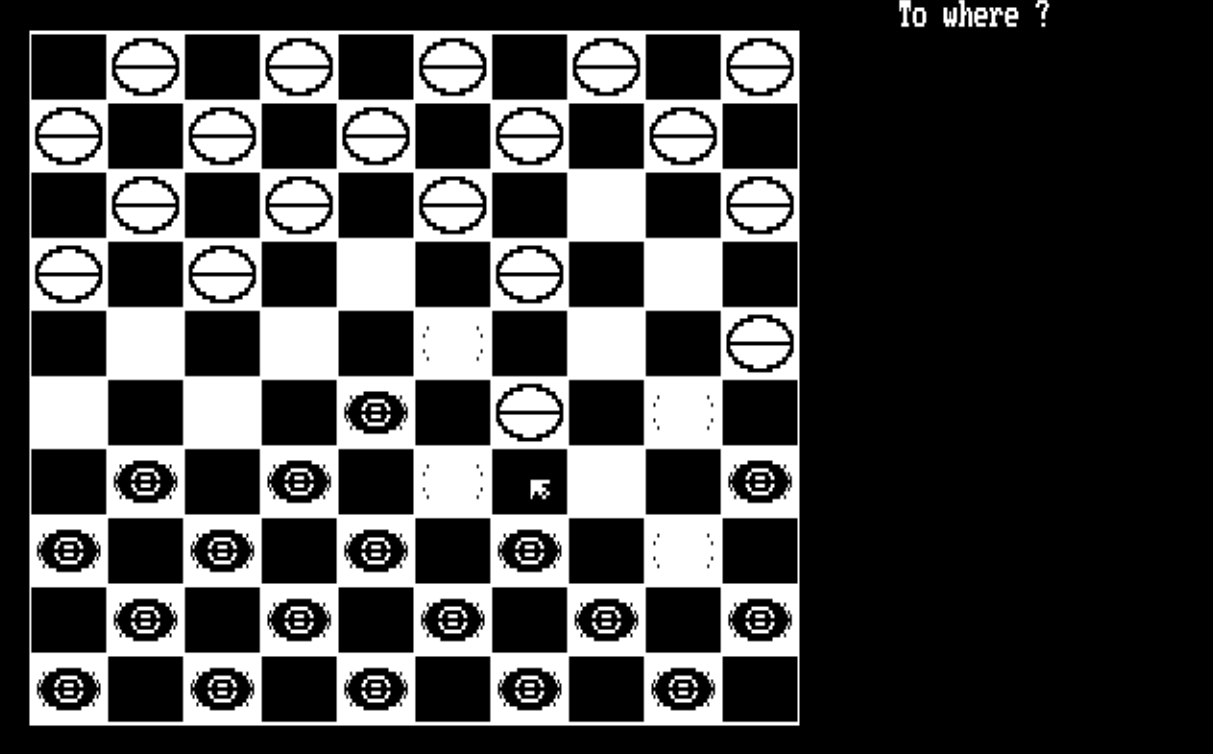
4.4. Checkers
This program is implementation of the game of Checkers, written in QBasic. It provides a mostly functional two-player experience on a 10x10 grid, where players can move and capture pieces according to the traditional rules of Checkers. User is playing against AI. AI is quite primitive. It has many hard-coded patterns that it tries to detect and utilize when possible.
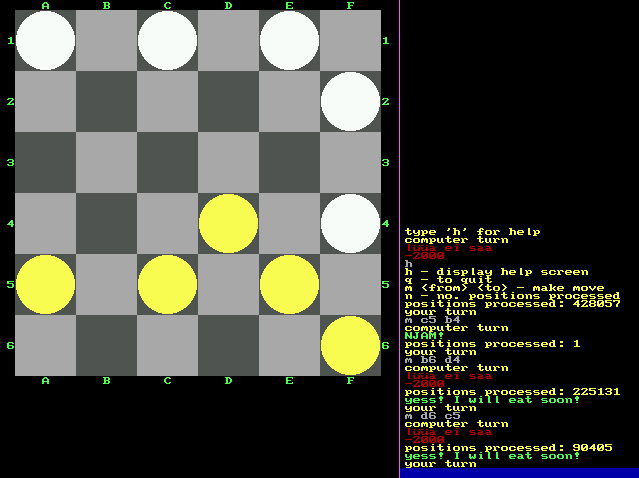
4.5. Checkers 2
This more advanced implementation of checkers. User can play checkers against the AI. AI does not have hard-coded patterns anymore. Instead it does recursive lookahead for possible own moves and following possible opponent moves up to determined cut-off depth. While crunching through all possible moves (up-to fixed depth), it chooses the best possible move for itself.
Board size is reduced to 6x6 grid to gain reasonable AI performance. Possible combinations count exponentially explodes with larder board size.
5. Math
5.1. Game of life animation
This QBasic program creates a visually engaging 3D animation that combines elements of cellular automata with dynamic graphics. The program simulates a rotating 3D scene composed of cubes that appear and disappear according to Conway's Game of Life rules. This classic algorithm models the life cycles of cells on a grid, where each cell can live, die, or reproduce based on its neighbors.
The Game of Life is a zero-player game, meaning that its evolution is determined by its initial state, requiring no further input.
The main loop of the program continuously updates the camera position and rotation angles, generating a dynamic view of the 3D scene. Cubes are drawn based on the current state of the Game of Life grid, and the scene is rendered frame by frame.
Download source code: Source code
5.2. Game of life studio
Game of life studio. One interacts with the Game of Life by creating an initial configuration and observing how it evolves. This program provides a platform to simulate, edit, and save different configurations of the Game of Life.
5.3. Math functions plot
Collection of programs that produce 2D and 3D plots of mathematical functions.
![]()
5.4. Simulations
Collection of programs that implement simulations of various mathematical and physical effects.
![]()
5.5. Truth table calculator
Program allows user to input logical equation. Thereafter program computes and displays all possible states for equation (aka. truth table).
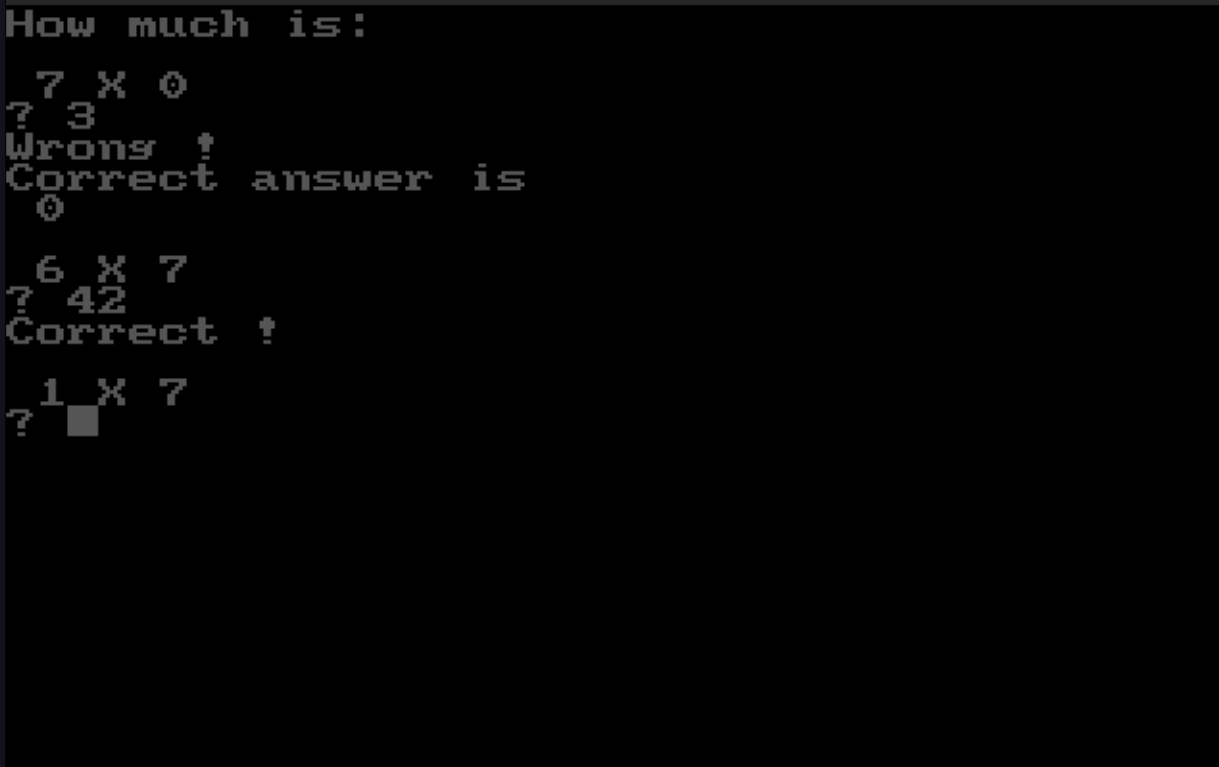
5.6. Multiplication trainer
This QBasic program is an educational tool designed to help users practice and test their multiplication skills. It is particularly useful for students learning basic arithmetic or anyone looking to brush up on their multiplication tables.
The program generates random multiplication questions by selecting two numbers between 0 and 9.
The user is prompted to enter the product of the two numbers. The program validates the input and provides immediate feedback.
The program keeps track of correct and incorrect answers. After the specified number of questions, it calculates the user's score and assigns a grade based on the percentage of correct answers.
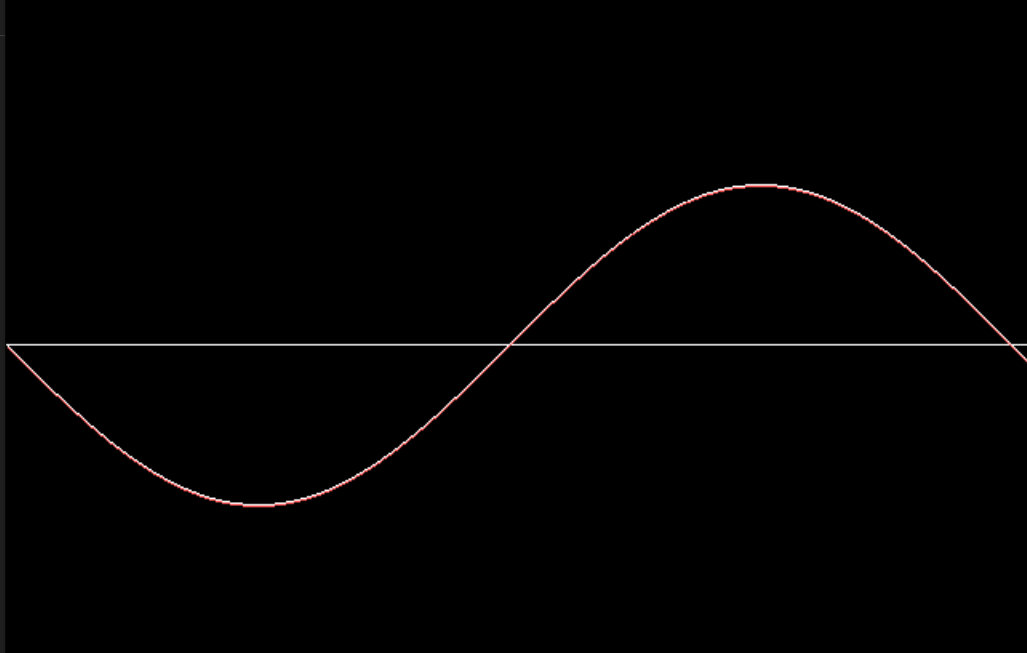
5.7. Alternative sine calculator
Here simple and finite function was invented to compute sine values. Custom sine values are shown alongside standard built-in sine function to compare results. 1 pixel vertical shift is intentional.
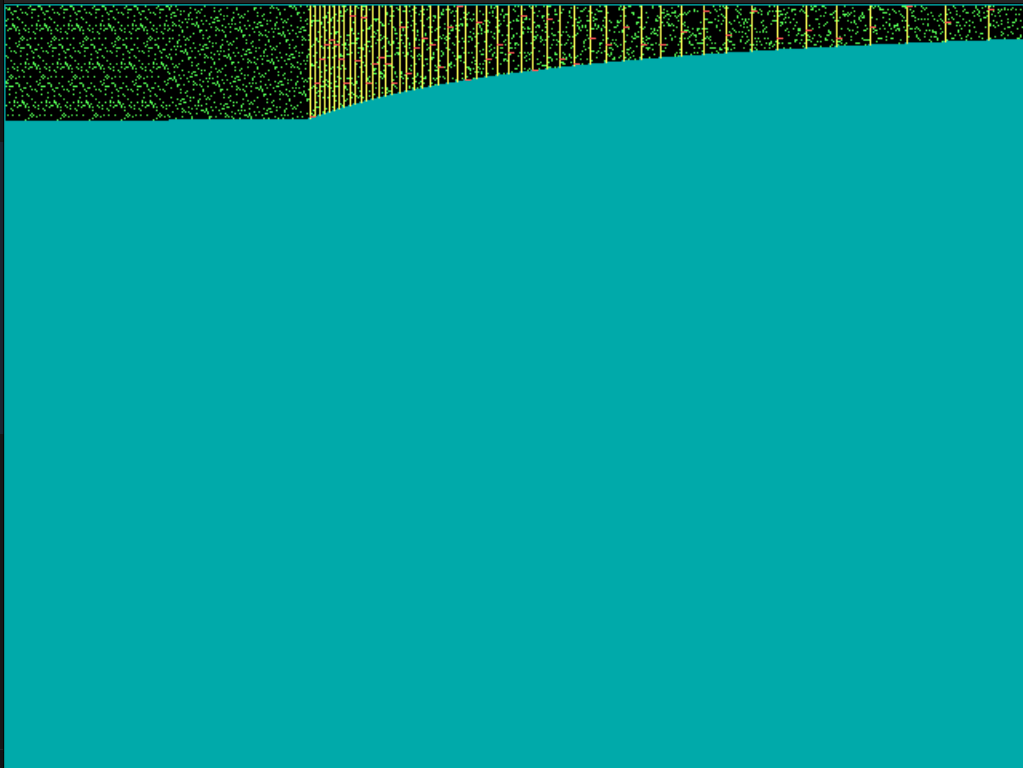
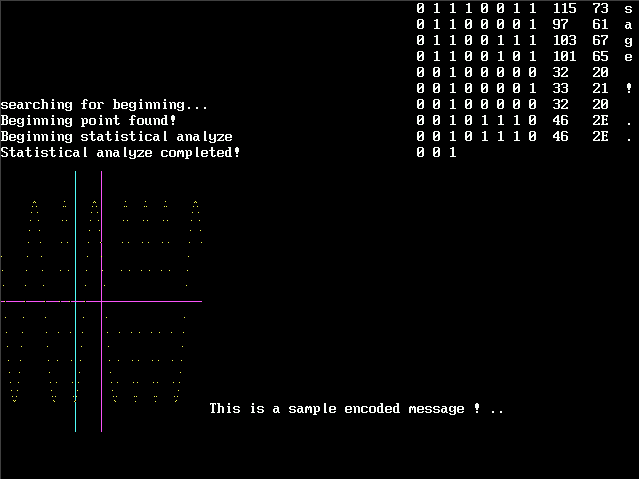
5.8. Lottery analysis
This QBasic program is designed to analyze historical lottery data, providing various graphical representations and statistical insights. It is a useful tool for anyone interested in exploring patterns and trends in lottery numbers over time. The program reads data from a text file and offers multiple visualization options to help users understand the data better.
Note: In the example data there are made-up numbers and there are repetitions in example data on-purpose. Those repeating patterns become easily detectable in visual graphs.
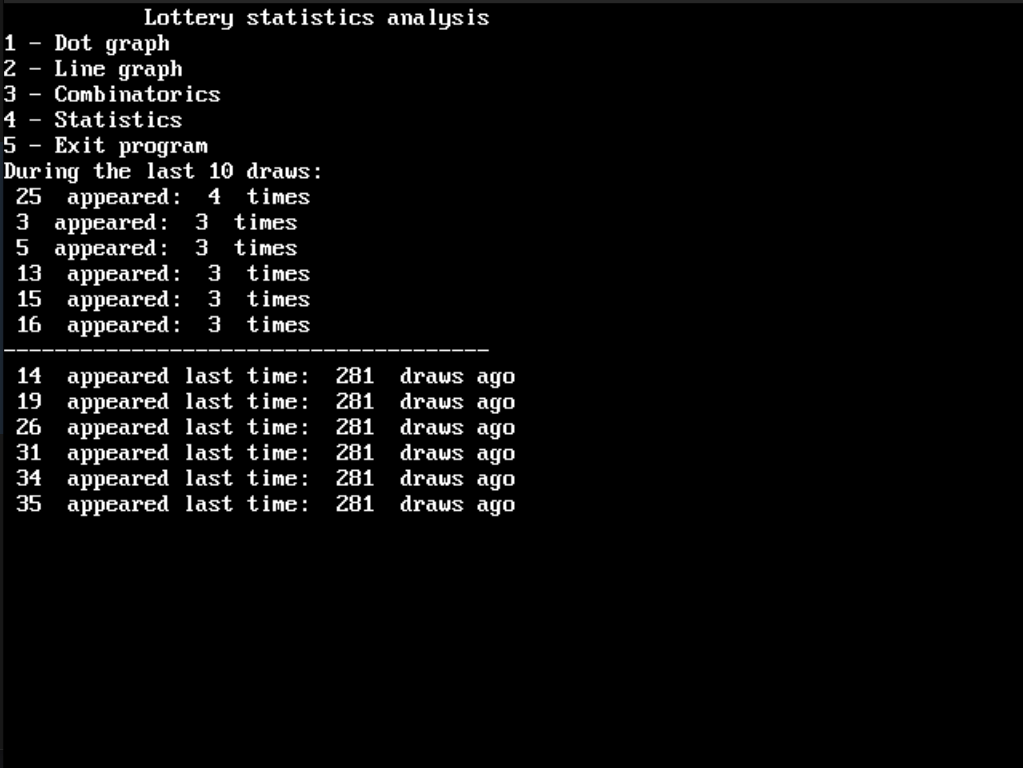
Graphical Representations:
- Dot Graph
- Displays lottery numbers as dots on a graph, with vertical lines representing each draw. This visualization helps in identifying the frequency and distribution of numbers.

- Line Graph
- Shows a dynamic line graph connecting consecutive lottery numbers, providing a visual representation of number trends over time. This can be useful for spotting trends or anomalies in the data.
- Combinatorics Graph
- This graph fits the data to every possible resolution, making it easier to spot patterns that might not be visible at a single resolution. This feature introduces the concept of combinatorics and pattern recognition in data visualization.
6. Misc
6.1. Mouse driver for QBasic
QBasic, a popular programming language in the DOS era, lacks native mouse support. This limitation can be a hurdle for developers looking to create interactive applications. To bridge this gap, I developed a solution that involves a Terminate and Stay Resident (TSR) program written in x86 assembly and a QBasic demonstration program.

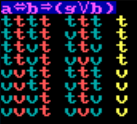
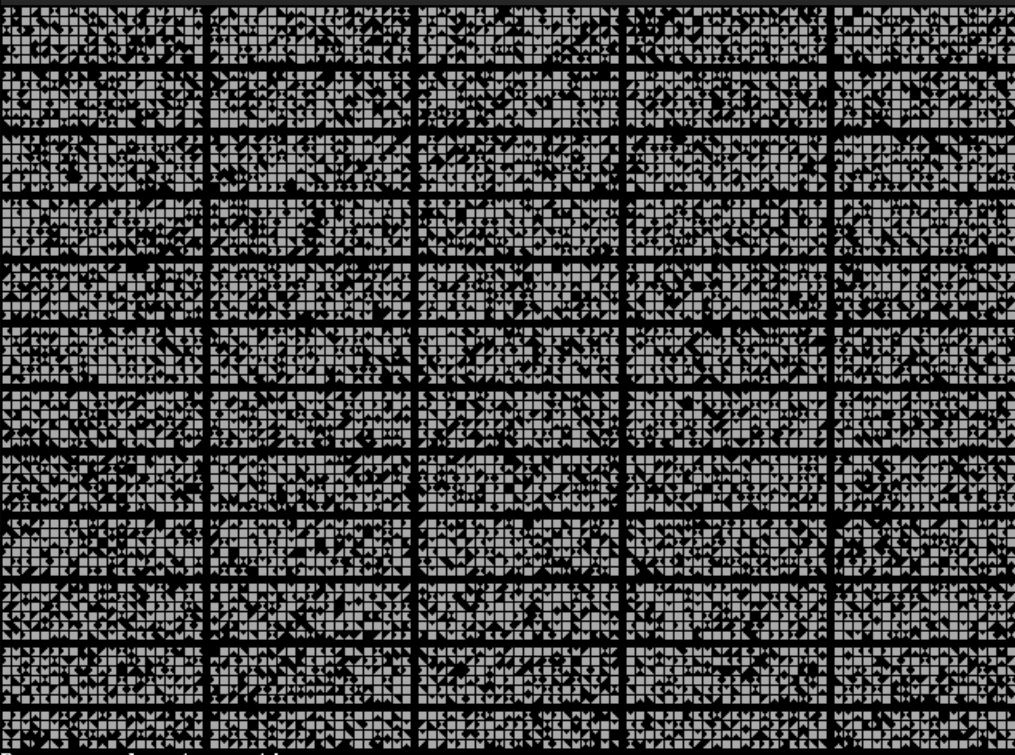
6.2. Alien font
This QBasic program is a creative attempt to generate and display an imaginary alien script. The program constructs characters by subdividing a square into four triangles, creating an abstract and visually intriguing text pattern. It is an artistic exploration that can inspire those interested in procedural generation, graphics, and abstract art.
6.3. Custom palette
This QBasic program generates a universally reusable color palette designed for a 256-color limit, which was a common constraint in older computer graphics. The program demonstrates how to create a diverse set of colors by varying the red, green, and blue components and then uses these colors to draw patterns on the screen.
Each component is varied from 0 to 5, and the resulting RGB values are output to the palette registers, creating a total of 216 unique colors (6x6x6).
After generating the color palette, the program draws a grid of colored squares. Each square is filled with a color from the generated palette, providing a visual representation of all available colors:

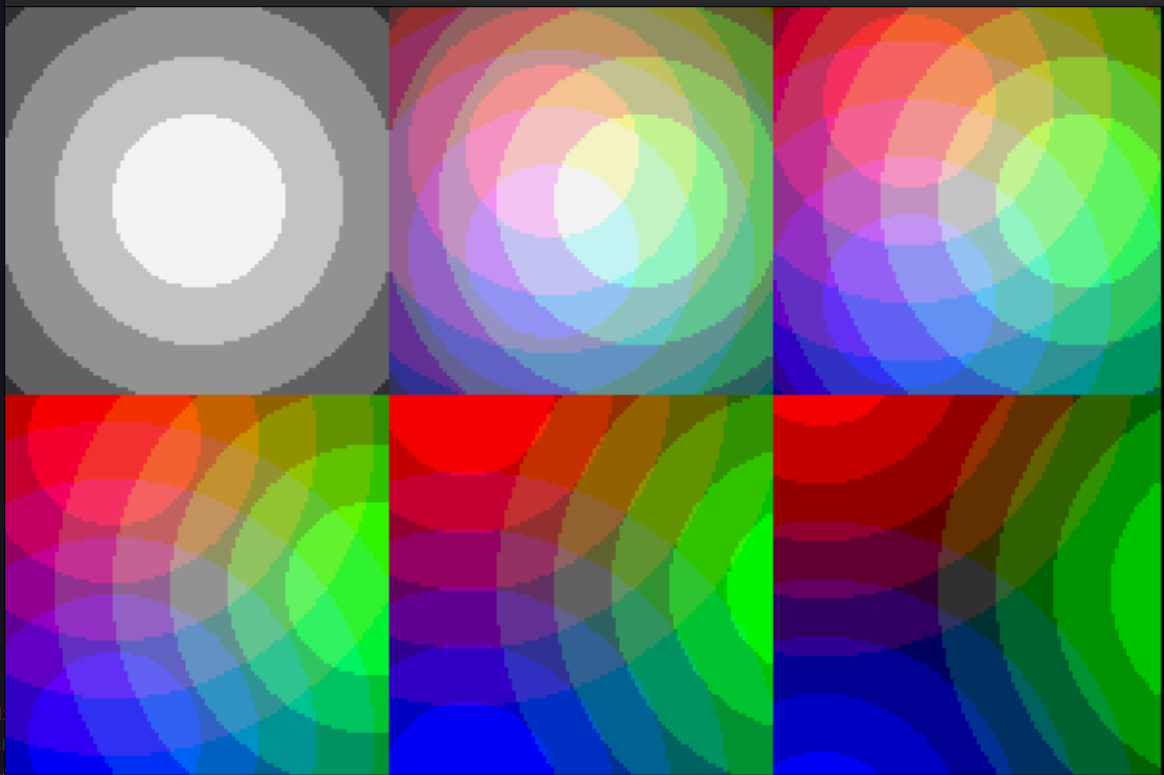
The dithering process helps to mitigate the limitations of the 256-color palette, making the gradients appear smoother to the eye:
6.4. Alarm 1
This QBasic program simulates the sound of a security alarm siren. It creates an oscillating sound effect by varying the frequency of the primary tone, mimicking the familiar rise-and-fall pattern of a siren.
The program works by initializing a frequency variable and playing a primary oscillating tone alongside secondary fixed-frequency tones. This combination produces a realistic alarm sound. The frequency of the primary tone increases and decreases within set thresholds, controlled by conditional checks and loops.
' Program to play sound that resembles security alarm.
' This program is free software: released under Creative Commons Zero (CC0) license
' by Svjatoslav Agejenko.
' Email: svjatoslav@svjatoslav.eu
' Homepage: http://www.svjatoslav.eu
'
' Changelog:
' ?, Initial version
' 2024 - 2025, Enhanced program readability

SCREEN 1
CLS

' Initialize main frequency control variable
' This will create the oscillating siren effect by increasing/decreasing value
currentFrequency = 40

StartLoop:
    ' Play primary oscillating tone (main siren component)
    ' Frequency sweeps up and down between thresholds
    SOUND currentFrequency, .3

    ' Add secondary fixed-frequency component (200Hz for 1 duration unit)
    ' Creates layered audio effect that makes alarm more realistic
    ' Duration parameter uses QBasic's time units (1 ≈ 0.05 seconds)
    SOUND 200, 1

    ' Rapidly increase frequency for ascending siren sweep
    ' Jump amount (100) creates dramatic pitch jumps
    currentFrequency = currentFrequency + 100

    ' Check if we've exceeded upper frequency threshold (1000Hz)
    ' If yes, switch to descending phase
    IF currentFrequency > 1000 THEN GoTo DecreaseFrequency

    ' Repeat ascending sweep until reaching maximum threshold
    GOTO StartLoop

DecreaseFrequency:
    ' Continue playing oscillating tone during descending phase
    SOUND currentFrequency, .3

    ' Add high-pitched pulse (500Hz for short duration)
    ' Creates distinctive alarm "warble" pattern
    ' Shorter duration (.2) adds rhythmic pulsing
    SOUND 500, .2

    ' Gradually decrease frequency for descending sweep
    ' Smaller decrement (10) creates slower descent than ascent
    currentFrequency = currentFrequency - 10

    ' Check if we've dropped below lower threshold (200Hz)
    ' If yes, restart ascending phase to complete siren cycle
    IF currentFrequency < 200 THEN GoTo StartLoop

    ' Continue descending sweep until reaching minimum threshold
    GOTO DecreaseFrequency
Download source code: Alarm 1.bas
6.5. Alarm 2
This QBasic program generates a security alarm sound effect by alternating between two distinct audio patterns. The first pattern features an ascending sweep of frequencies from 100 Hz to 1000 Hz, paired with a counterpoint tone that decreases in frequency. The second pattern involves a descending sweep from 1000 Hz back to 100 Hz, enhanced with a harmonic overtone to create a richer sound texture.
' This program generates a security alarm sound effect with two alternating patterns

DEFINT A-Z

' Start of infinite alarm cycle
1

    ' Pattern 1: Ascending frequency sweep with counterpoint tone
    ' Increase primary frequency from 100Hz to 1000Hz in steps of 3Hz
    FOR ascendingFrequency = 100 TO 1000 STEP 3
        ' Play main ascending tone
        SOUND ascendingFrequency, .05

        ' Generate counterpoint tone that decreases as primary increases
        ' Formula creates complementary frequency by subtracting double current frequency
        ' At 100Hz -> 5000-2*100=4800Hz; At 1000Hz -> 5000-2*1000=3000Hz
        counterToneFrequency = 5000 - (ascendingFrequency * 2)
        SOUND counterToneFrequency, .1
    NEXT ascendingFrequency

    ' Pattern 2: Descending frequency sweep with harmonic enhancement
    ' Decrease frequency from 1000Hz back to 100Hz in larger steps (-5)
    FOR descendingFrequency = 1000 TO 100 STEP -5
        ' Play main descending tone
        SOUND descendingFrequency, .05

        ' Add harmonic overtone at triple frequency plus small offset
        ' Creates richer, more complex sound texture
        harmonicFrequency = (descendingFrequency * 3) + 10
        SOUND harmonicFrequency, .05
    NEXT descendingFrequency

' Continuously repeat between both sound patterns
GOTO 1
Download source code: Alarm 2.bas
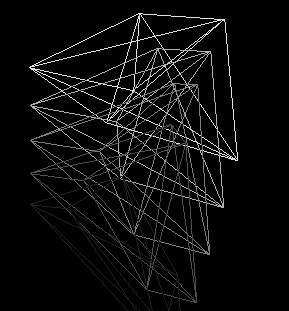
6.6. 4D engine
Implementation of 4 dimensional (4D) engine. It's like 3D (X, Y, Z) but with additional extra dimension that I decided to call Q.
6.6.1. Polygon -> Tetrahedron -> Pentatope
- In 2D world you can have polygon. It takes 3 vertices (points) to define. It is the minimal object in 2D world to have surface.
- In 3D world you can have tetrahedron. It takes 4 vertices to define. It is the minimal object in 3D world to have volume.
- In 4D world you can have 5-cell (aka. pentatope). It takes 5 vertices to define. It is the minimal object in 4D world to have hypervolume (aka. 4D volume).
6.6.2. Planes or rotation in 3D world vs 4D world
In 3D space, the planes of rotation correspond to rotations around the three principal axes, and they are as follows:
- The yz-plane, corresponding to rotation around the x-axis.
- The xz-plane, corresponding to rotation around the y-axis.
- The xy-plane, corresponding to rotation around the z-axis.
In 4D space, there are six possible planes of rotation, which can be described by the combinations of two axes out of four. These are:
- The yz-plane (same as in 3D space)
- The xz-plane (same as in 3D space)
- The xy-plane (same as in 3D space)
- The xq-plane (novel plane)
- The yq-plane (novel plane)
- The zq-plane (novel plane)
6.6.3. Representing higher-dimensional objects through lower-dimensional slices
The concept of representing higher-dimensional objects through lower-dimensional slices involves taking cross-sections along one dimension and viewing the resulting shapes.
Here’s how it applies to both 3D to 2D and 4D to 3D representations:
- Representing a 3D Shape in 2D:
- A 3D object can be represented as a series of 2D slices by taking cross-sections along one axis (e.g., the z-axis). Each slice is a flat, 2D shape that corresponds to the intersection of the 3D object with a plane at a particular position along that axis.
- By stacking these 2D slices together in sequence, you can reconstruct the 3D object. This method is akin to how CT scans create images of the inside of a body by combining multiple cross-sectional X-ray images.
- Representing a 4D Object in 3D:
- Similarly, a 4D object can be represented in 3D space by taking cross-sections along the fourth dimension. Each cross-section is a 3D shape that represents the intersection of the 4D object with a hyperplane at a particular position along the fourth axis (e.g., Q-axis).
- By viewing these 3D slices in sequence, you can form an idea of the structure and shape of the 4D object. This process allows us to visualize a 4D object by observing how the 3D cross-sections change over the fourth dimension.
In both cases, the method of "slicing" allows us to understand and visualize objects in dimensions that we cannot directly perceive, by breaking them down into more manageable and comprehensible lower-dimensional pieces.
6.6.4. Implementation
Current 4D engine renders single pentatope. Each pentatope vertex is defined by 4 coordinates within 4D space:X, Y, Z, Q.
You can rotate pentatope around any plane in 4D space (all 6 are supported). Also you as a viewer can move around any axis in 4D space (all 4 are supported).
4D pentatope is shown on a screen as a series of 3D slices with varying brightness along the new Q axis.
Wireframe rendering is quite useful in this case because it allows to see multiple overlayed 3D shapes at the same time.
It is interesting how 3D slices of 4D pentatope stay as familiar tetrahedrons while you rotate the shape along familiar X,Y,Z axis. But shape starts changing in weird ways when you start rotating it along novel planes of 4D space.
Download source code: 4D engine.bas
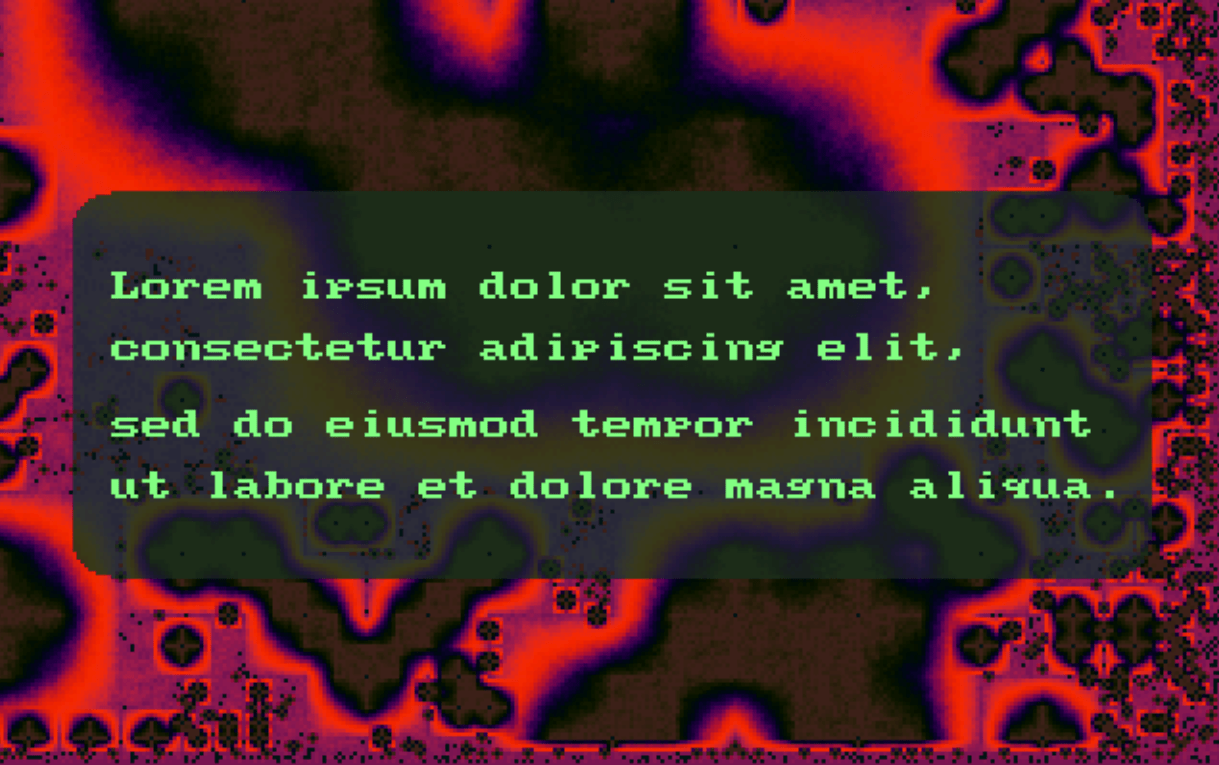
6.7. Windowing system
This QBasic program implements a text mode windowing system, allowing users to create and manage multiple windows on the screen. Each window can display the contents of a text file and supports horizontal and vertical scrolling. The program is designed to demonstrate basic window management and text display functionalities in a text-based environment.
Windows are drawn on the screen with borders and titles.
The program includes a simple animation loop that shifts the content of the active window, creating a dynamic visual effect.
Download source code: Windowing system.bas
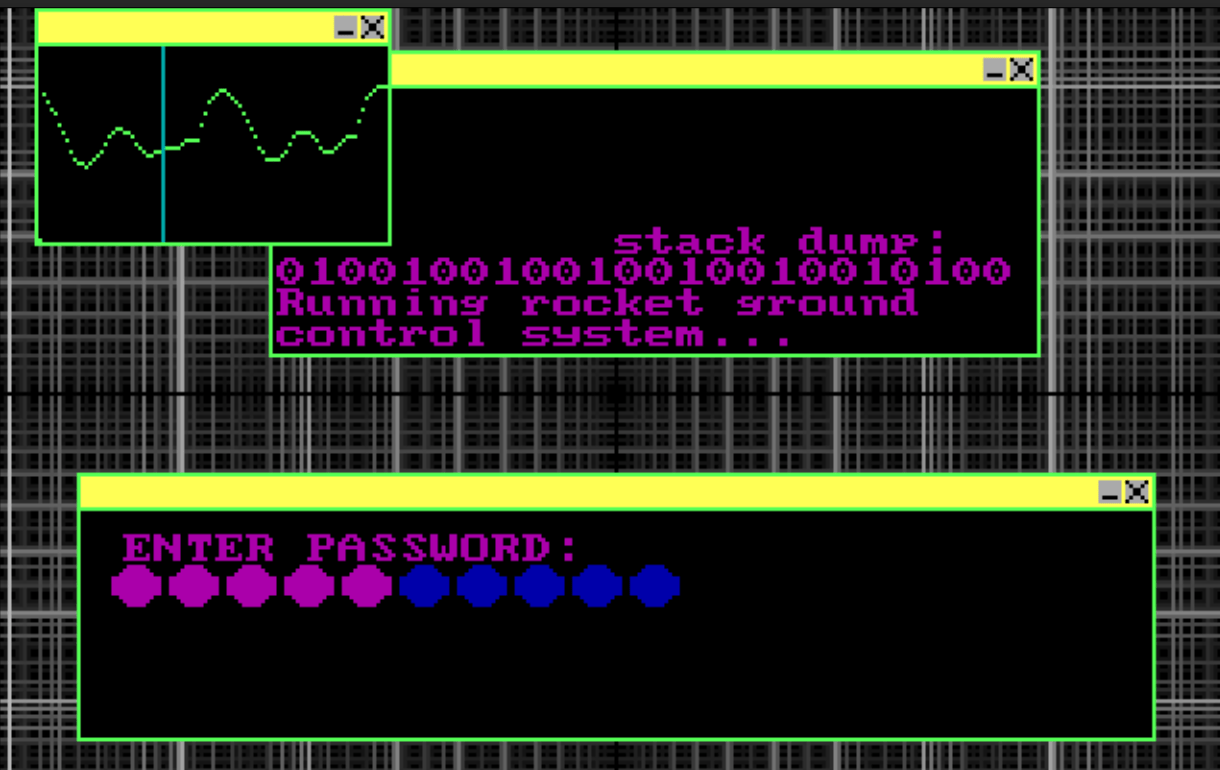
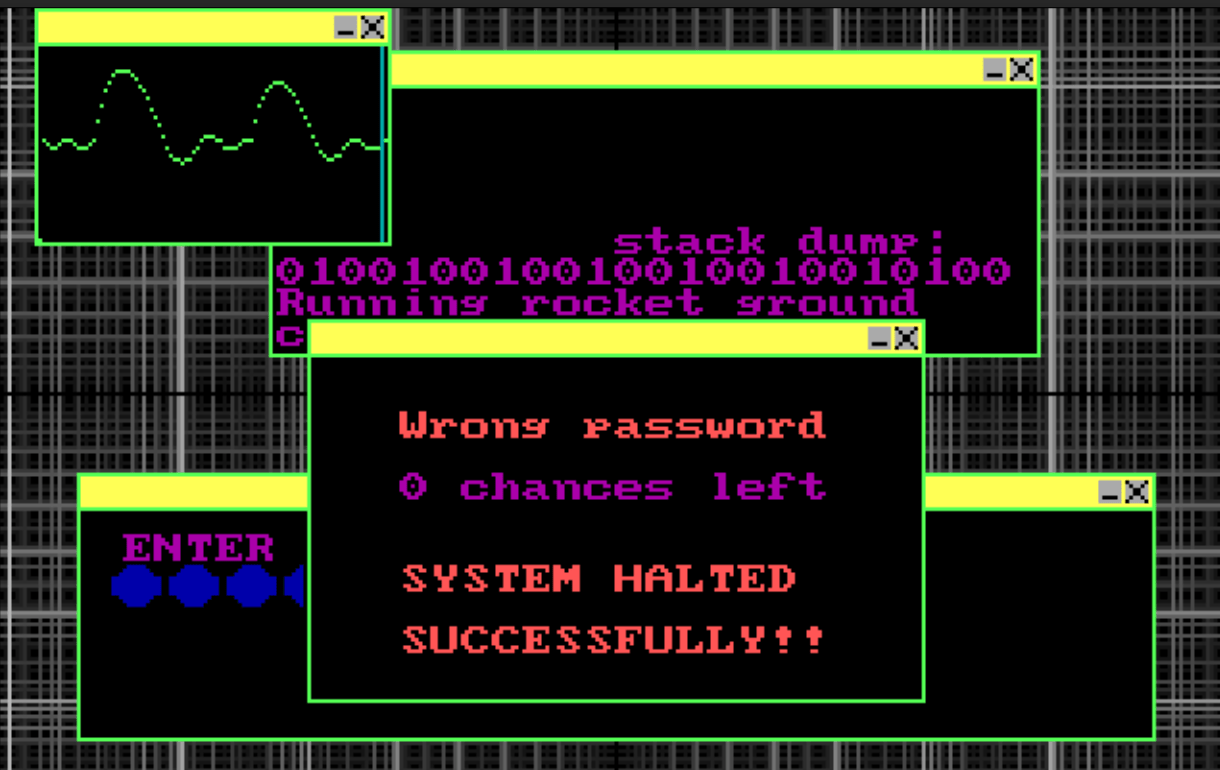
6.8. Password lock
This QBasic program simulates a retro-styled rocket control system interface with a password protection mechanism. The program is designed to provide a visually engaging experience reminiscent of early computer systems.
The password is stored in an external file (passw.dat).
The program captures and processes user input for password entry, including handling special keys like Enter and Backspace.
When the user presses Enter, the program checks the entered password against the stored password. If the password is correct, the program exits. If not, it displays an error message and decreases the number of remaining attempts.
The user has three attempts to enter the correct password. After three failed attempts, the program halts and displays a "SYSTEM HALTED" message.
Download source code: passw.bas
7. Networking
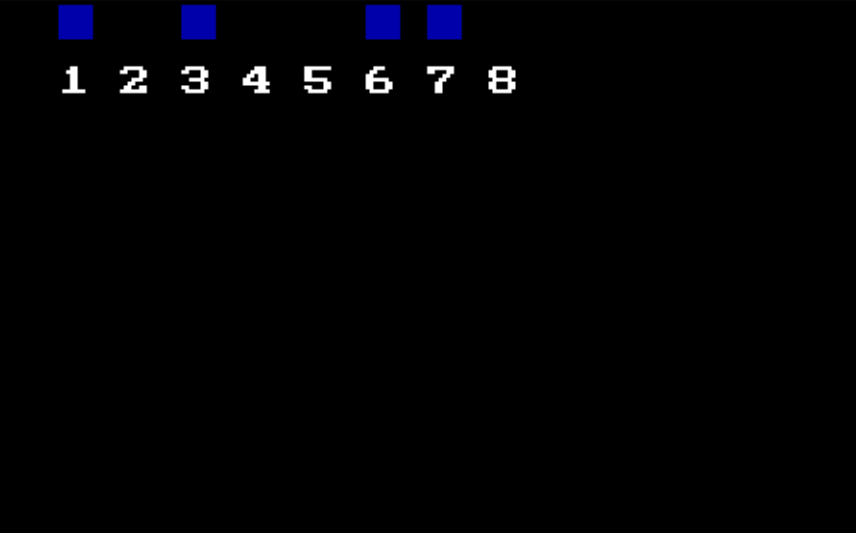
7.1. LPT port pin control
This QBasic program is designed to control the voltage on individual pins of an LPT (Line Print Terminal) port, commonly known as a parallel port. This type of port was traditionally used for connecting printers to computers but can also be used for simple hardware control tasks.
The program allows users to toggle the voltage on each of the 8 pins of the LPT port using keys 1 through 8 on the keyboard. When a key is pressed, the corresponding pin's state is toggled between on (high voltage) and off (low voltage).
The program uses bit manipulation to control individual pins.
Download source code: LPT pin control.bas
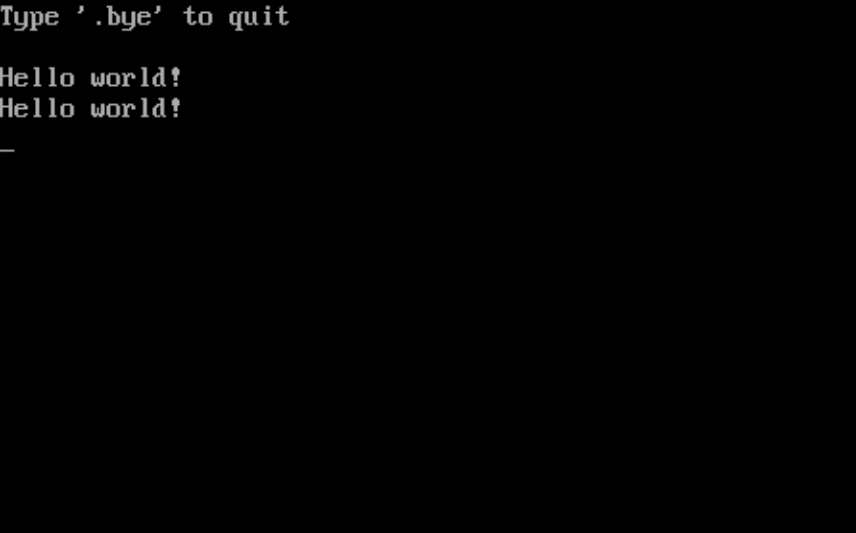
7.2. COM port text terminal
The COM port, short for "Communication Port" was a serial port interface found on older personal computers. It was primarily used for serial communication, where data is transmitted one bit at a time over a communication channel.
The COM port facilitated bidirectional communication between the computer and connected devices, such as modems, mice, and keyboards.
Typically available as 9-pin (DE-9) connectors, COM ports adhered to the RS-232 standard for serial communication.
Mice, before the prevalence of USB, commonly connected to computers via COM ports, transmitting movement and button-click data through this serial interface.
COM ports operated using a UART (Universal Asynchronous Receiver/Transmitter), which managed the conversion of data between parallel form (used by the computer) and serial form (used by the communication line).
This program is a simple text mode terminal for communicating through a COM port.
How it Works:
- The program continuously checks the COM port status.
- If data is available, it reads the data and prints it to the screen along with its ASCII value.
- It captures keyboard input from the user and sends it out through the COM port.
- This creates a bidirectional communication channel between the user's keyboard and the COM port device, typical of terminal emulation software.
' Simple COM port terminal
'
' This program is free software: released under Creative Commons Zero (CC0) license
' by Svjatoslav Agejenko.
' Email: svjatoslav@svjatoslav.eu
' Homepage: http://www.svjatoslav.eu
'
' Changelog:
' 2003.12, Initial version

CLS

1
    ' Read the status of the COM port
    portStatus = INP(&H3FD)

    ' Check if data is available
    IF portStatus = 97 THEN
        ' Read the data from the COM port
        comData = INP(&H3F8)

        ' Print the character and its ASCII value
        PRINT CHR$(comData);
        PRINT comData;
    END IF

    ' Get user input
    userInput$ = INKEY$

    ' If there is any input, print it and send to COM port
    IF userInput$ <> "" THEN
        PRINT userInput$;

        ' Send the ASCII value of the input character to the COM port
        OUT &H3F8, ASC(userInput$)
    END IF

' Repeat the process
GOTO 1
Download source code: COM port terminal.bas
7.3. Parallel port to COM port text terminal
This QBasic program demonstrates a clever method of transmitting data from a parallel (LPT) port to a serial (COM) port using a technique known as bit-banging.
How It Works:
- The program initializes the parallel port and waits for keyboard input.
- Each character input from the keyboard is converted into its ASCII value.
- The ASCII value is converted into an 8-bit binary array, with each array element representing a bit of the character.
- Each bit is then sent to the parallel port by toggling the output lines accordingly. The bits are transmitted sequentially, simulating serial data transmission.
- A loop holds each bit value for a predefined duration, mimicking clock cycles necessary for serial communication.
- The program exits when the Escape key is pressed.
' This is quite unusual program. It sends data from LPT port (parallel
' printer port) to COM (serial mouse) port. It does it by bit-banging
' the data out of the LPT port. If you connect appropriate wire from
' LPT port output bit (pin #3) to COM port input bit, you can send
' data from LPT to COM.
'
' Note:
' - Ground wire must be connected between LPT and COM ports too.
' - Use this program at your own risk. It may not work on your system or may even damage it.
'
' This program is free software: released under Creative Commons Zero (CC0) license
' by Svjatoslav Agejenko.
' Email: svjatoslav@svjatoslav.eu
' Homepage: http://www.svjatoslav.eu
'
' Changelog:
' 2002, Initial version
' 2024, Improved program readability

DEFINT A-Z
DECLARE SUB sendChar (char$)
DIM SHARED port
port = &H378 ' LPT port

PRINT "Type something. All keyboard strokes will be transmitted."
PRINT "ESC to exit"

1
inputChar$ = INPUT$(1)
IF inputChar$ = CHR$(27) THEN SYSTEM
PRINT inputChar$;
sendChar inputChar$
GOTO 1

SUB sendChar (char$)
    ' Convert the character into its ASCII value
    asciiValue = ASC(char$)

    DIM bitArray(0 TO 8)
    bitArray(0) = 0
    bitArray(8) = 0

    bValue = 64
    cIndex = 7
2
    ' Convert the ASCII value into a binary representation
    IF asciiValue >= bValue THEN
        bitArray(cIndex) = 1
        asciiValue = asciiValue - bValue
    ELSE
        bitArray(cIndex) = 0
    END IF

    ' Divide the value by 2 and move to the next bit
    bValue = bValue / 2
    cIndex = cIndex - 1

    IF cIndex <> 0 GOTO 2

    ' Send each bit of the character through the LPT port
    FOR a = 0 TO 8
        IF bitArray(a) = 0 THEN
            bValue = 255
        ELSE
            bValue = 0
        END IF

        ' Adjust this loop based on your system and QBasic interpreter speed
        FOR c = 0 TO 9
            OUT port, bValue
        NEXT c
    NEXT a

    ' Reset the LPT port to 0 after sending the character
    OUT port, 0

END SUB
Download source code: LPT to COM port data transfer.bas
7.4. LPT communication driver
TSR driver that allows 2 computers to communicate over parallel port serially.
7.5. Data over analog audio CODEC
7.6. Morse
This QBasic program allows users to input text and hear it played back in Morse code using the PC speaker. It's a fun and educational tool for anyone interested in learning Morse code.
It reads Morse code patterns from an external file named Morse.txt. Each line in the file represents a character and its corresponding Morse code:
a .-
b -...
c -.-.
d -..
e .
f ..-.
g --.
h ....
i ..
j .---
k -.-
l .-..
m --
n -.
o ---
p .--.
q --.-
r .-.
s ...
t -
u ..-
v ...-
w .--
x -..-
y -.--
z --..
0 -----
1 .----
2 ..---
3 ...--
4 ....-
5 .....
6 -....
7 --...
8 ---..
9 ----.
For each character in the input text, the program looks up its Morse code pattern and plays it back using the PC speaker. Dots are represented by short beeps, and dashes by longer beeps.
Download source code: Morse.bas
8. Download
8.1. Getting the source code
Programs author is Svjatoslav Agejenko
- Homepage: https://svjatoslav.eu (See also other software projects.)
- Email: mailto://svjatoslav@svjatoslav.eu
These programs are free software: released under Creative Commons Zero (CC0) license.
- Browse Git repository online.
- Download latest snapshot in TAR GZ format.
You can clone Git repository using git:
git clone https://www3.svjatoslav.eu/git/qbasicapps.git
8.2. Installation and Usage
There are various ways to run legacy QBasic applications under Debian GNU/Linux:
- Full system virtualization
- One way would be to use full system
virtualization with QEMU, VirtualBox or VMware Workstation or Player. After creating virtual machine, you need to obtain and install some distribution of DOS like MS-DOS or FreeDOS. Within DOS you can then use either Microsoft QBasic or Microsoft QuickBasic. QBasic is already included in Microsoft DOS by default. QuickBasic is more capable but must be obtained separately.
- QB64
- QB64 is mostly compatible with Microsoft BASIC variants and can be used too.
- DOSBox + MS BASIC
- Easy to install and good compatibility.
8.2.1. DOSBox + MS BASIC
Following tutorial focuses on using DOSBox with original Microsoft QBasic or QuickBasic.
DOSBox is trivial to install and BASIC programs do not need to be copied to virtual drive or operating system to run them. Using original BASIC binaries ensures good compatibility.
Here is suggested installation and usage procedure:
Install DOSBox by running the following command in your terminal:
sudo apt-get install dosbox
Obtain and place a copy of QuickBasic QB.EXE executable binary into directory QB45 within project root directory.
Optionally obtain Volkov Commander executable VC.COM and place it under project root directory. Volkov Commander simplifies filesystem navigation and running arbitrary BASIC program by selecting it and pressing ENTER key. For this to work, BAS file extension is mapped to BASIC executable within VC.EXT file (already available in the project root directory). In case you are using QBasic instead, feel free to fix VC.EXT to point to appropriate BASIC executable.
- Optionally check and apply DOSBox usage tips.
Execute script that is located in the root directory of the repository:
./run_dosbox.sh
- Now project root directory appears as root directory of virtual C: drive. You can navigate around and start programs.
Here is suggested project directory layout with QuickBasic and Volkov Commander installed:
├── COPYING
├── index.org
├── QB45
│   ├── QB.EXE
│   └── QB.INI
├── run_dosbox.sh
├── (... other repository files and directories)
├── VC.COM
├── VC.EXT
└── VC.INI
8.2.2. DOSBox usage tips
8.2.2.1. How to change keyboard layout to Dvorak
In case you want to use Dvorak keyboard layout and DOSBox fails to auto-apply it, here is how you can set it manually:
Edit file:
~/.dosbox/dosbox-<version>.conf
Disable scancodes usage:
usescancodes=false
- Save the changes and restart DOSBox for the configuration to take effect.
8.2.2.2. Increase window size
If you have big high-resolution screen, by default DOSBox window could appear small. To make it bigger:
Edit file:
~/.dosbox/dosbox-<version>.conf
Set windowresolution to either of those values:
windowresolution=1366x768
windowresolution=1600x900
- Save the changes and restart DOSBox for the configuration to take effect.
If scaling did not work, set output to opengl:
output=opengl
8.2.2.3. Exit mouse capture
DOSBox detects when a game uses mouse control. When you click on the screen, it should get locked (confined to the DOSBox window) and work.
To release mouse lock, press:
CTRL-F10
8.2.2.4. Increase CPU speed for better animation smoothness
Many applications benefit from as fast CPU as possible. Games and animations that require limited frames per second always have their own CPU independent mechanisms for limiting animation speed. So setting CPU as fast as possible within emulator is beneficial.
This is how I accomplished it in DOSBox:
Edit file:
~/.dosbox/dosbox-<version>.conf
Edit [cpu] section accordingly:
[cpu]
core=normal
cputype=auto
cycles=fixed 100000
- Save the changes and restart DOSBox for the configuration to take effect.
8.3. See also
- Programs found in the March 1975 3rd printing of David Ahl's 101 BASIC Computer Games, published by Digital Equipment Corp: https://github.com/maurymarkowitz/101-BASIC-Computer-Games
- QB64 is a modern extended BASIC programming language that retains QBasic/QuickBASIC 4.5 compatibility and compiles native binaries for Windows, Linux, and macOS: https://qb64.com/